Make your own Christmas decorations – step-by step instructions
The Christmas season is approaching - the perfect opportunity to make yourself cosy, decorate your home festively and make your own creative Christmas decorations.
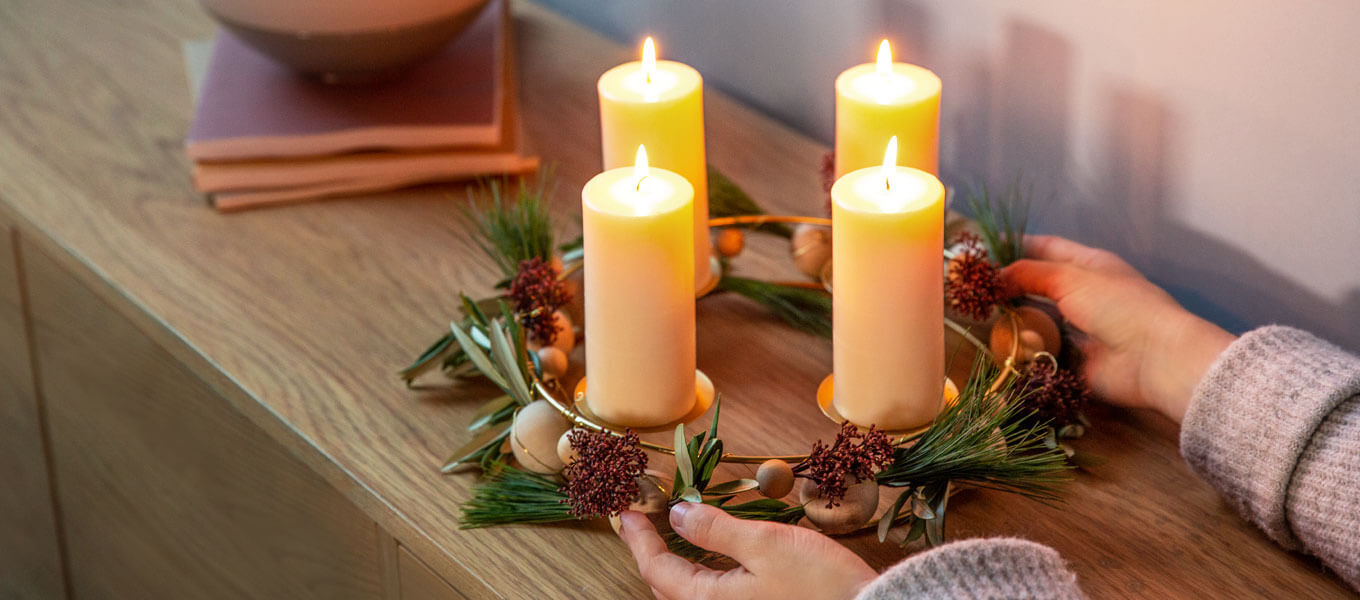
That's why we've come up with a Christmas decoration crafting guide that is really easy and can also be done with children: We use air-drying clay, wool scraps and a few wooden baubles to create beautiful, elegant DIY pendants. You can attach these sustainable Christmas decorations to Christmas branches, hang them in your window, use them as Christmas door decorations, attach them to presents or use them as table decorations at Christmas.
Would you like to make your own quick Christmas decorations straight away? You can find all the instructions for DIY Christmas decorations in this article.
We used rose gold asparagus for our Christmas decorations. If you can't find this, you can also collect some beautiful grasses or ferns, press them and then give them a classy finish with gold-coloured acrylic spray. This DIY idea is not only suitable for utilising beautiful treasures from nature, but also for wool scraps that have accumulated at home.
What you need:
- air-drying clay
- Coloured dried flowers or grasses (e.g. rose gold asparagus)
- wooden balls
- a piece of baking paper
- rolling pin or acrylic roller
- round cookie cutter
- matching coloured yarn
- shashlik skewer / toothpick
- fork
- scissors
- If necessary, a small bowl of water and fine sandpaper
Step-by-step instructions
Step 1: Roll out the air-drying modelling clay
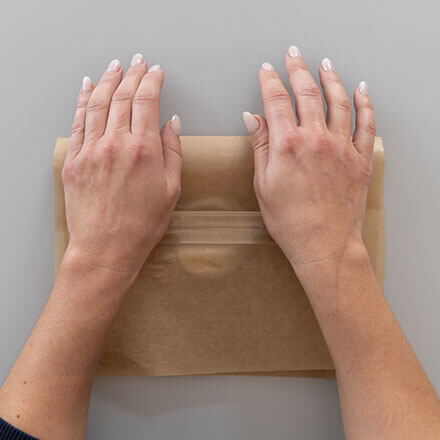
The first step is to roll out the air-drying modelling clay. To do this, shape the desired amount into a ball and roll out evenly between two layers of baking paper using an acrylic roller (or a rolling pin). It will be even more even if you place two wooden strips of the desired thickness (e.g. 5 mm) to the left and right of your modelling clay.
Step 2: Place the ornamental grass on top and roll firmly
As soon as your modelling clay has the desired thickness, remove the upper baking paper and spread the dried grasses over the surface with sufficient space between them. If necessary, moisten the surface slightly beforehand. Replace the baking paper and roll the grass firmly again.
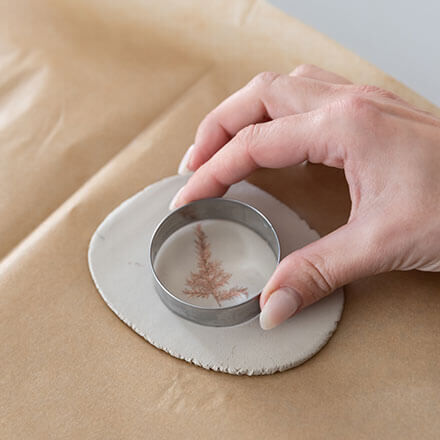
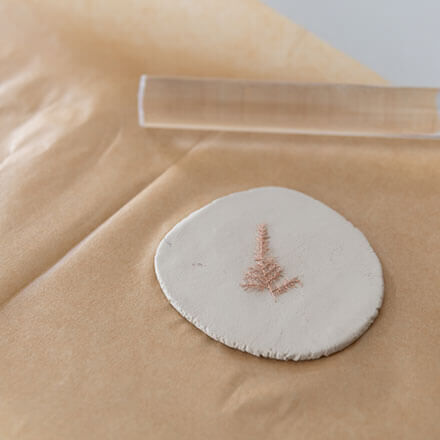
Step 3: Cut out the Christmas tags
The Christmas tags can then be cut out. To do this, remove the top baking paper. Cut out the tags using a round cookie cutter so that the grasses are relatively centred.
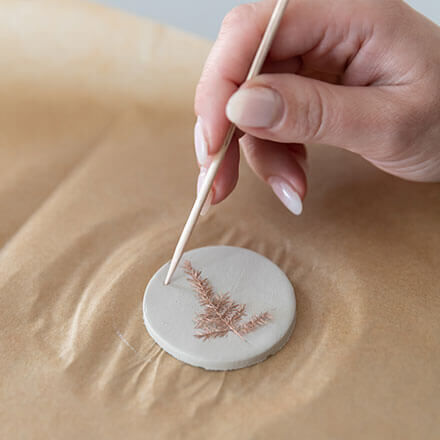
Step 4: Drill the holes and leave to dry
You can then use a shashlik skewer to pierce the holes for hanging up the pendants. The holes should be large enough for your thread or yarn to fit through. Now you need to be patient and allow your mould to dry completely (usually 24 hours), depending on the manufacturer's instructions. You can then smooth the edges with some sandpaper.

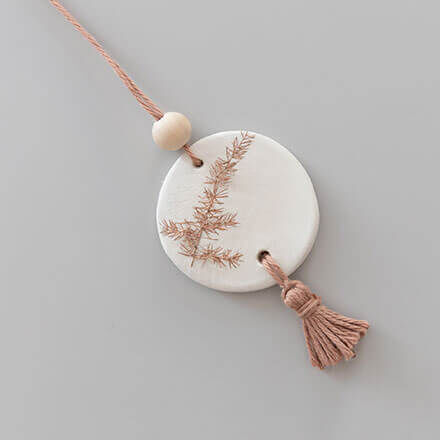
Step 5: Making tassels
In the meantime, you can prepare the tassels for your pendants. You will need about 20 cm of the yarn of your choice, the rest can be unwound directly from the spool of yarn. Place the 20 cm cut in the centre over your fork prongs. This will later become the hanger. Thread the beginning of your spool of thread through the top prong of your fork, leaving a little overhang of 10 cm. Now wind the thread several times (approx. 8-10 rounds depending on the thickness of the yarn) around the entire fork prongs including the hanger thread. At the end, pick up the beginning of your yarn again and wrap it around the rolled-up threads several times, pulling them together. Tie a knot at the end and cut off. Cut the threads of the tassel at the lower end. Knot the hanging thread once, thread it through the modelling clay pendant and knot it at the back.
Done!
Now you can easily make your own Christmas decorations. We wish you lots of fun with it!

Vera's heart has always beaten for beautiful interior design things and DIY. She turned this passion into her profession in 2016 and has since been sharing creative DIY ideas and inspiration about beautiful living on her blog „studiovea", which is intended to motivate her readers to become creative themselves.