DIY Door Wreath for Spring
At Christmas time, our front doors are usually adorned with lavish and beautiful door wreaths. But what comes after that? All around us, things are getting greener and flowers are starting to bloom. From delicate to vibrant colours - the world of flowers is becoming more diverse and fresh again. What if we could conjure up this freshness on our doorstep? Because a beautiful animal wreath attracts everyone's attention, and not just at Christmas time, and makes us and our visitors smile at the sight of it. So get started - because the DIY spring door wreath is easier to make than you think. Just get started and enjoy the result.
Materials required:
- Straw wreath blank 25 cm or 30 cm (for doors with glass inserts, a straw blank wrapped with a ribbon is preferable)
- Fresh bindweed, e.g. flowering cherry laurel, blueberry, pistachio
- Fresh flowers that dry well, e.g. wax flowers, gypsophila, beach lilacs, kangaroo paws
- Binding wire
- Patent staples
- Secateurs / strong scissors
- Ribbon for hanging
Instructions for a springtime door wreath - we'll show you how it's done:
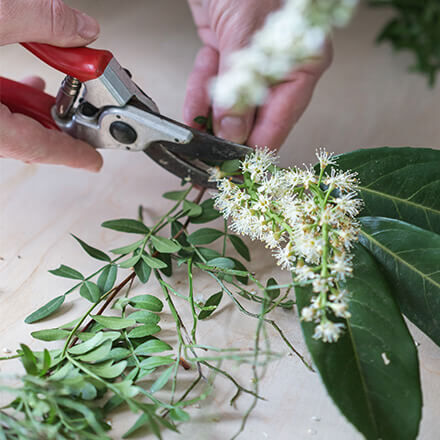
Step 1: Cut the greenery to size
So that you don't have to keep interrupting while you're tying the wreath, it's more practical to cut the material you need right at the start. To do this, cut the greenery into pieces approx. 15-20 cm long. The best way to do this is with secateurs, alternatively you can also use good household or craft scissors. Then arrange the bindweed by type at the workstation.
Tip: If you want the wreath to be more compact and "neat", cut the tying material as short as possible; for a somewhat wilder wreath, you can also use a few longer pieces.
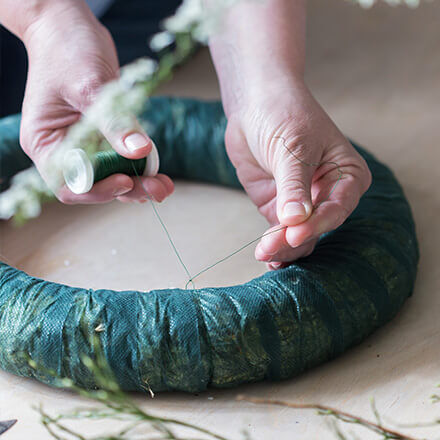
Step 2: Fixing the wire
Before you can start tying, the binding wire must first be attached to the wreath. To do this, wrap the wire once around the wreath and twist the end piece with the wire still on the spool to secure it. Cut off the short end slightly and insert it into the wreath so that you cannot injure yourself. Leave the other end of the wire on the wire spool so that you have a better grip on the wire when tying.
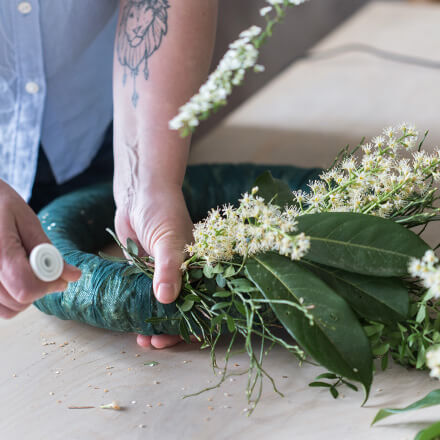
Step 3: Tie the wreath
Form small "bunches" with the previously cut greenery and wrap them around the wreath blank using the wire. To help, grip the wreath blank so that your thumb holds the stems of the greenery. Then wrap the wire two or three times and tighten. Tightening is important because the greenery loses some of its volume after a certain time as it dries and may then loosen if the wire has not been tightened properly. Tip: The wreath will be particularly dense if you attach one bunch of greenery to the top, one to the left and one to the right of the wreath blank. Repeat this step until the wreath is completely covered with greenery. The back of the wreath blank remains free.

Step 4: Finalise tying
When you reach the beginning of the tying process, it is time to finalise the tying process. So that you can't see where the beginning was at the end, simply hold the greenery carefully upwards with your hand and push the styles under the "leaves" of the very first bunch of greenery.

Step 5: Attach the wire
The last step in the binding process is to cut off the excess wire of approx. 10cm from the wire spool. Wrap the end of the wire around a patent clasp and insert this into the back of the wreath blank. This prevents the wire from coming loose and keeps the wreath nice and tight.
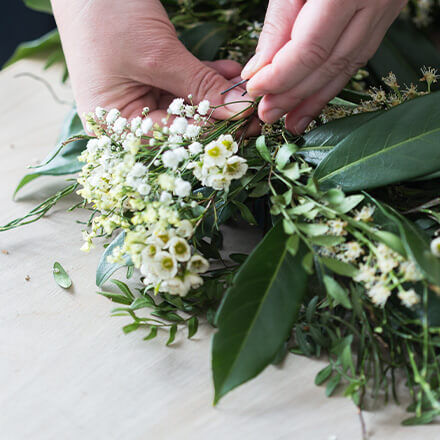
Step 6: Decorate the wreath with flowers
Now decorate the green wreath blank in a springtime style. There are no limits to your imagination here. I opted for a subtle yellow and white version. To ensure that you can enjoy the wreath for a long time, you should make sure that the flowers used last as long as possible without water or use flowers that dry out nicely without water. The first step (as with the greenery) is to cut the required binding material in advance and put together small bouquets. These are then attached to the wreath using so-called adhesive patents (metal clips). To do this, simply place the adhesive patents over the stems of the small bouquets and then fix them between the greenery of the wreath where you want. This quickly gives the wreath a spring-like look all round.
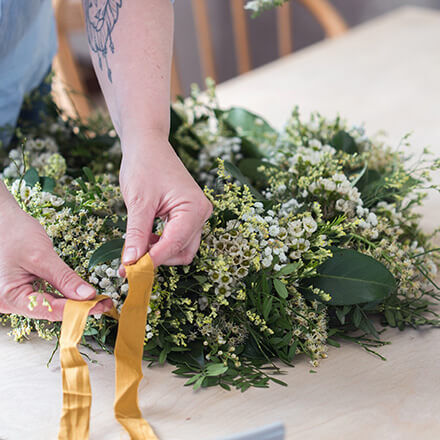
Step 7: Attach the ribbon
To use the wreath as a door wreath, simply place a cotton ribbon of your choice around the wreath and secure it with a loop knot. This makes it easy to hang the wreath.

Done!
The finished door wreath adds a springtime glow to any front door.
Tip: the look of the wreath can be changed very easily and at any time. To do this, simply add other or more flowers using additional adhesive patents.

Alternative to the door wreath
As an alternative to the door wreath, the spring wreath can also simply be placed decoratively on the table or a sideboard. You can also use a simple lantern in the centre. This is an easy way to conjure up a fresh and spring-like decorative idea in your own four walls.

The mum-of-three lives by the motto "there's never enough decoration" and deals with the topics of DIY and sustainability, among others. Whether it's home ideas, crafting instructions or recipes - everyone will find something for themselves.